


The basic tutorial applies for fisheye lenses lenses too, with a few differences.
First, we need to enable Rotational Search. In the Preferences make sure that Rotational search is enabled in the Control Points Editor tab.

After loading the images into a project, we need to check if hugin knows that those are fisheye images. In the Camera and Lens tab, look at the Lens type (f) column. If the lens type is wrong, select any of the lines and change its type to either Circular fisheye or Full frame fisheye in the Lens section of the Geometric tab. Which of the two is easy: circular if the edges of the sensor frame are outside of the edges of the lens, and full frame if not.
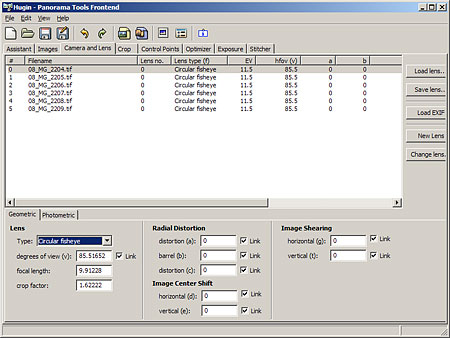
For full frame fisheye, this is it – continue with the basic tutorial. For circular fisheye there is one additional step in the Crop tab.
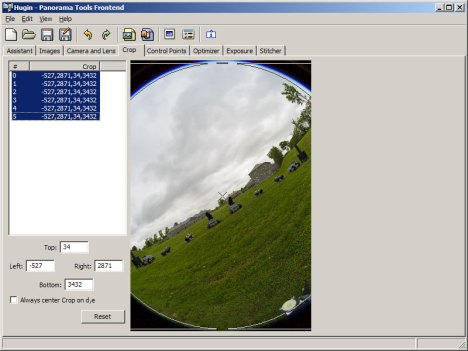
Select all the images that will have the same crop (i.e. same orientation) and drag the mouse inside the image to match the circle approximately around the edge of the lens. You can leave the Always center Crop on d,e box checked. In the above screenshot it is unchecked because I use it to correct for small shifts of the no-parallax-point position in relation to the pano head nodal point, but that’s for another tutorial.

Leave a comment