


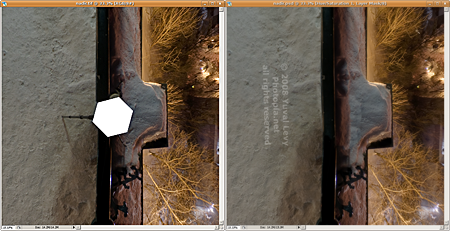
This is a full spherical panorama stitched with hugin. There is a visible white hole at the nadir. Difficult to edit, because it is strechted. This tutorial will demonstrate how to extract the nadir view, edit it, and insert it back into the panorama.

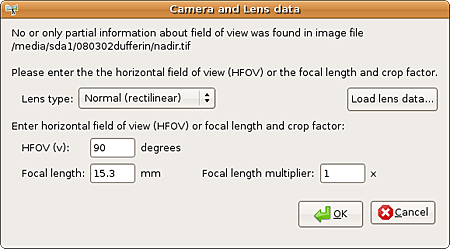
Start hugin. In the Images tab, click on the Add individual images… button. Select the stitched equirectangular and load it. Hugin will promt for the Camera and Lens data. Enter the values below and click OK.

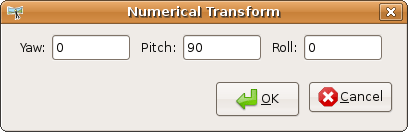
Click the Num. Transf. button in the Panorama preview window, enter the values below and click OK.
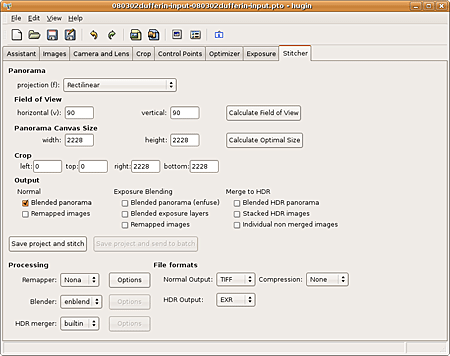
In the Stitcher tab, set the projection to Rectilinear and the Field of View to 90 horizontal and 90 vertical, like in the screenshot below. Press the Calculate Optimal Size button and the Save project and stitch button.
Open the resulting file with your preferred image editor. I currently use Photoshop in ubuntu. Edit and save as TIFF.
Back in hugin. In the Images tab, click on the Add individual images… button. Either you have saved the previous project with the equirectangular, or you can reload the equirectangular as in the first step of the tutorial. Add the edited nadir. At the Camera and Lens data prompt enter the values below and click OK.
Move the nadir image up the list on top of the equirectangular image. Select it in the list and set its pitch to -90.

Check the final panorama in the Panorama preview window. Then in the Stitcher tab, output the remapped images. Load them as layers into an image editor and they should align properly. Save and publish. Click on the thumbnail at the following page to interact with this panorama as a full screen VR.
This is just one method – there are plenty of them. The advantage of this method is that it can be used to quickly generate a layered nadir view – very useful if you have a number of shots covering the area and you want to be able to mask the one or the other. If you don’t need layered output, you’re better off using the Panotools Photoshop Plugins. Advanced tutorials will follow.
Filed under: hugin, tutorial | 4 Comments »
